 LinkedIn has become the official business outpost in cyberspace with more than 100 million professional business people now registered. This well-respected social media platform is the right place — and this is the right time — for your organization to set up and maintain a detailed description of who you are and what you do.
Recent enhancements to LinkedIn now enable members to have more control over Company Pages — which offer powerful tools for building and managing an organization’s digital presence.
These days it is clear that “people do business with people and not organizations,” and LinkedIn’s Company pages offer a “human side” to business. Company Pages provide a great way for LinkedIn members to research everything they want to know about a company from products and services to who works there and what they do. Company pages even provide a professional space for freelancers to promote their businesses and expertise.
Your step-by-step guide to setting up a LinkedIn Company Page
STEP ONE: Start the process by creating your company’s profile page
[NOTE: Below the instructions is my first attempt at a Jing video presentation of this article. Click on the link, but forgive the fact that this is my first attempt at a screencast video and I have a cold.]
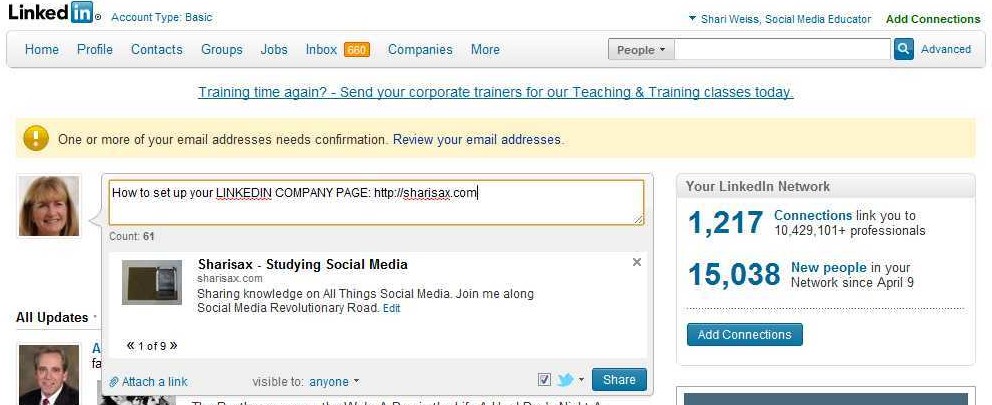
a. Go to your own LinkedIn page and click on the word Companies on the top ride side of the menu board.
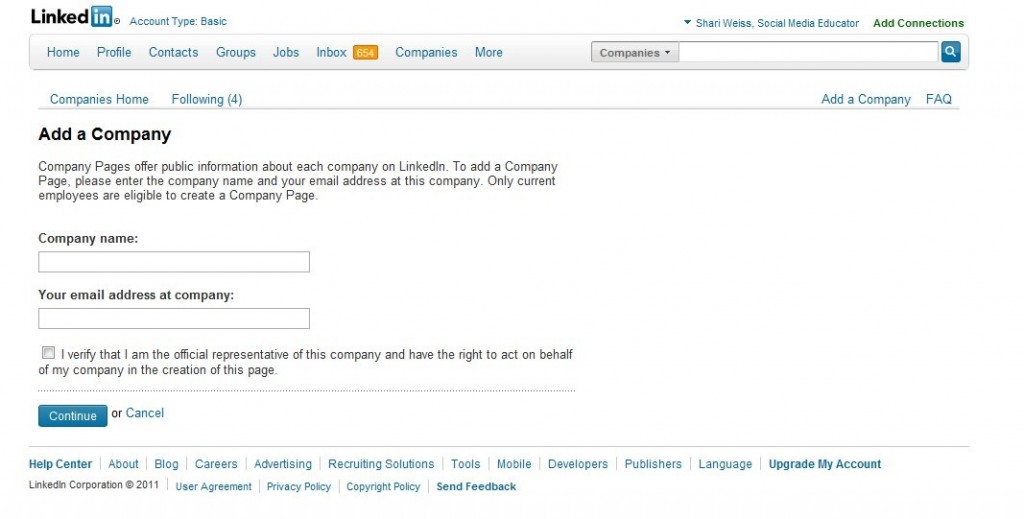
b. Select “Add a company” — located on the top right underneath the search box. You will see this box:
c. Fill in company name AND your email address at the company. Make certain to use an email address AT THE COMPANY. Email addresses using yahoo, gmail, AOL, etc. will not allow you to set up a company. Then check the box that verifies you can officially represent the company.
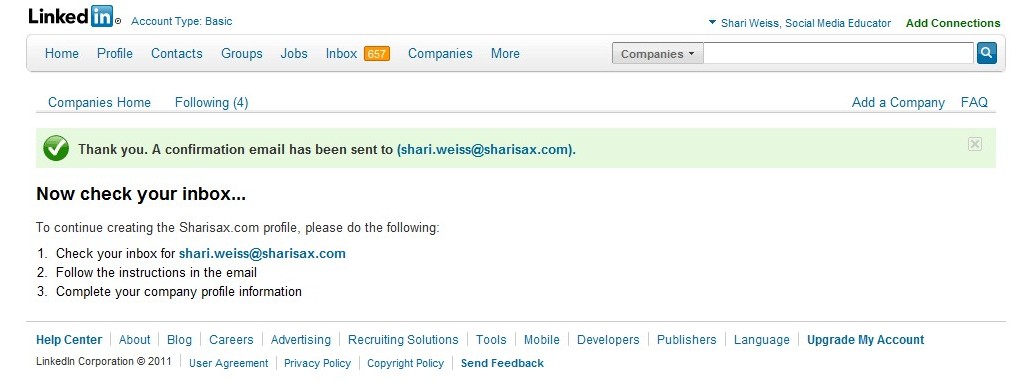
d. When you click “Continue” you’ll get the message to “check your email.”
e. Then you’ll need to access your email account, click on that link which takes you to the “Confirm Your Email Address.”
After clicking the “Confirm” button, you will be asked to sign in to your account to confirm this new email address. Sign in using your existing primary email address — even if different than your company email. [LinkedIn often asks you to “sign in” even after you have been using the site.]
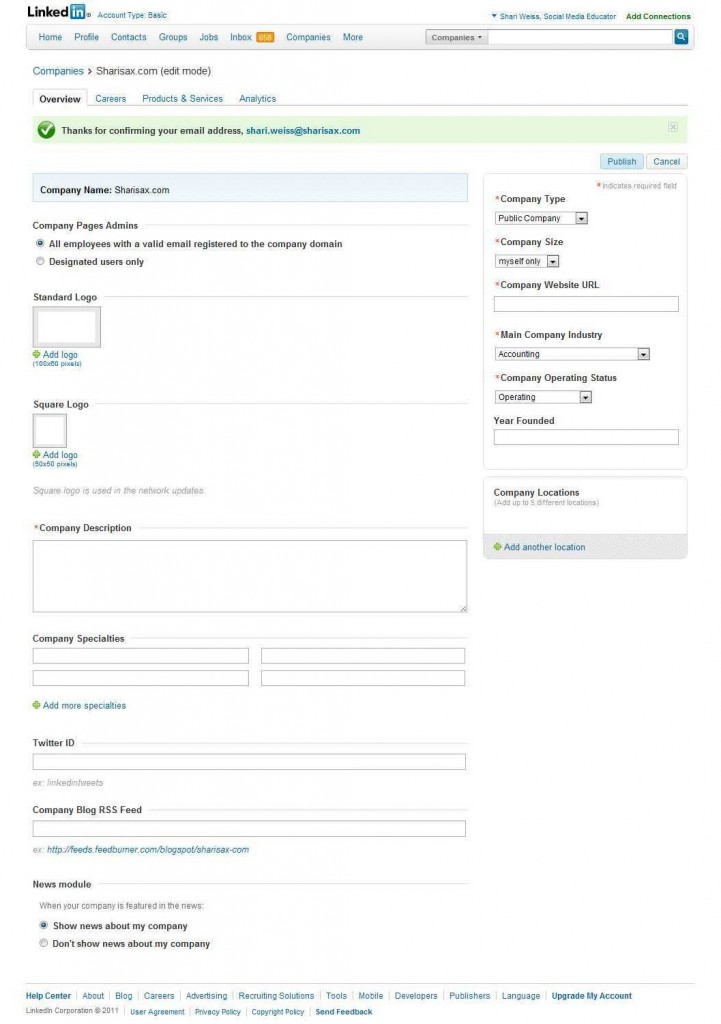
e. After signing in again, you will be able to add your company information on the following Company Overview screen:
f. In the first box on the left, select whether to allow ALL employees to administer the site OR choose “Designated users only” and then be certain to at least write in your own name.
g. Upload a logo: you have two choices. The second choice, the square one, is useful because it will accompany your company’s name. The first choice [the rectangular one] will not. So if you don’t have something square, you might want to create something to fit this opportunity.
h. Company description: LI “allows” you at least 150 characters. If you use any less, however, you will be asked for more before you can “publish” the page.
i. Company specialties: remember to use keywords here to help with “find-ability” in online searches. The admin page offers four boxes, but you can add more [and should].
j. Twitter ID? If you don’t have one, get one — and post it here.
k. Company blog RSS: If you use Google’s Feedburner, you can go to the Edit Feed Details to find the correct URL to add. [If you don’t use Feedburner, you are on your own for this one.]
l. Keep the default button selection for “show news about my company” unless you have a good reason not to.
m. ON THE RIGHT SIDE BAR, fill in the requested info in each dropdown box.
n. Then — Go up to the Top Right and press PUBLISH.
VOILA! Your LinkedIn Company Page is up and running.
Creating your Company Profile on LinkedIn is an excellent way to get your business name “out there” and ranked more successfully on Google and other search engines.
Stay tuned for Step TWO: Adding the New Features: Product/Services and Recommendation opportunities
[Screencast video of this article]
Here’s STEP TWO – Adding your Products & Services to your company page
