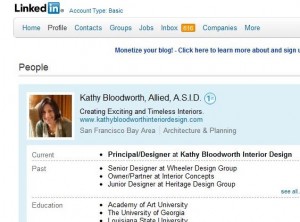
 My friend Barry had been unemployed for more than a year when he came to one of my LinkedIn workshops to maximize his site profile. Shortly thereafter he was tapped by an overseas firm for a very lucrative project. My brother Chuck had been at home “playing” with social media. I suggested he focus on LinkedIn; he did; now he’s got a great sales job. My fellow BNI-er Kathy has rebranded her design business beginning with a brand new LinkedIn profile.
And getting jobs and new business is only the beginning. See the previous post for why you need to join — and be active — on LinkedIn.
For maximum find-ability, be very deliberate in adding pertinent Key Words to your profile. When search engine spiders crawl the web to find answers to people’s queries, they look for the most credible sources. And LinkedIn is one of today’s Most Credible sources, so when you choose the key words relevant to your expertise — and add them into your profile –you will be Found. At the end of the article, you can check out my “scores” relating to being found online.
This tutorial will help you take the first critical step to LinkedIn success, and that is Posting a Great Profile. To help you do just that —
- Read the instructions
- Use the included worksheet to follow those instructions
- Check out my LI Profile for a model and/or comparison
Now go straight to “Edit Profile” function:
NOTE: See the “Profile” category on the top menu? If you point your cursor there, you will get a drop down box with the option to EDIT PROFILE.
STEP ONE: Your photo
Choose a good quality face shot. It’s okay if you have a “face made for radio”; people do business with people, not icons. Lots of people choose professional head shots. My personal feeling is that there is nothing wrong with that, but if you can get some color or pose that makes you stand out, so much the better. Some people feel you should change the face shot with some regularity. I disagree. My own experience is that I feel something of a “disconnect” when I see a different photo of someone I’ve grown to know online.
How do you add your photo? Not difficult at all if you have a photo on your computer or a flash drive. Simply click on “Edit” under the photo box. You will see this instruction: “You can upload a JPG, GIF or PNG file (File size limit is 4 MB).” Search your computer and Upload. Then SAVE.
STEP TWO: The ALL-IMPORTANT Headline
Please whatever you do, do NOT neglect thoughtful consideration of your Headline. The worst thing you can do is “leave it to chance,” i.e. the default headline that appears when you input information about your current position. Also keep in mind, that every time you add a new position, you will need to Re-Edit your headline as LinkedIn automatically goes to this default headline.
WHY is your headline so important?
- LinkedIn results show up most readily in searches for people’s names.
- The Words used at the beginning of any post are most appealing to the search spiders — and thus most powerful.
- The “Headline” follows you around when you are searched for, when you answer questions on LinkedIn, on the list of connections for those you are Linked to, etc.
- MOST IMPORTANT, however, is that this is the place where people first find out WHO you are and WHAT you can do for THEM.
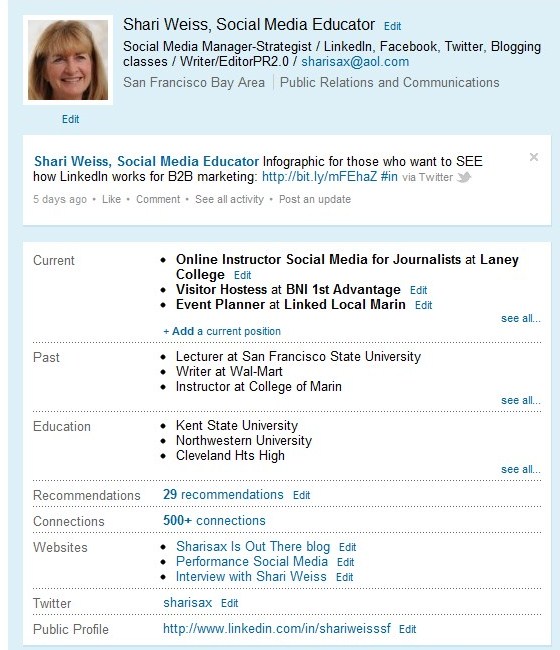
Think of your headline as your Personal Brand Statement. This begins with the opportunity to ADD keywords to your name, e.g., my adding Social Media Educator. You can include these keywords by putting a comma after your last name in the edit box and following with the title.
Then you have 120 characters, and you should use every one of them. Best practice is to begin with BENEFITS for those reading your profile. Follow this with a career category or job position, and your email address. [Some people suggest that LinkedIn discourages email addresses in your profile, but my experience is that this is no longer valid advice. If you have a different viewpoint, please add it to the comment section below.]
For a longer discussion and examples of “deliberate” headlines, check out my past profile maximization article.
Here’s the Top Half of my Profile:
 STEP THREE: Your “update”
Although technically not part of your profile per se, there is a box within which to add an update. And, if you have added one recently, it will show with your profile, when people find you on LinkedIn.
How often should you update, and what should you say?
First of all, keep in mind that even though many of today’s applications allow you to automatically update to All your social media sites at the same time, my best advice is NOT to do that. After all, if we are all automating, then who is reading.
While many people update frequently to Facebook and Twitter, Best Practice on LinkedIn is to keep it more “professional,” i.e. three times a week is probably ideal. You will not inundate your connections, but you can stay Top of Mind.
So what should you say? The general advice is to say anything that contributes to your reputation as the Go-To Source for information/support in your expertise. Certainly you can share links to your own blog posts and other stories that are relevant to your target audience. In addition, you should pass along helpful news and tips that you pick up at conferences, meetings, and in your reading.
STEP FOUR: Current and past position[s]
When you download a resume, some of this data will be filled in automatically. But here’s a caveat: ALWAYS proofread what LinkedIn posts; there are bound to be many mistakes as well as repetitions. Better to manually fill in this information. And when you do, be Deliberate. Use as many key words in your job titles as you can authentically create.
[Here’s a tip for filling in information beyond these ten tips: You should “complete” your present and former job descriptions with loads and loads of key words. More about this when we discuss your summary.]
STEP FIVE: Recommendations
Testimonials and “word of mouth” is the currency of business these days, and LinkedIn’s recommendation power is huge. But how many recommendations do you need and how do you go about getting them?
First off, my experience is that anywhere between 20-30 recommendations seems ideal. More than that and you may seem like you are bragging. And who’s going to read 50 recommendations? If you have so many, no doubt they will not all be as beneficial, so why take the chance that with too many to select from, someone will read one of the less powerful ones.
Secondly, how do you go from zero to 25 recommendations?
a) When you just begin, you will probably need to ask some of your business associates who are on LinkedIn if they would write a recommendation for you. Remember they need to be a LinkedIn member to write a LinkedIn recommendation.
b) Do not, under any circumstances, send a blanket email to several of your closest friends asking the group to recommend you. You may not have them as your closest friends anymore if you do this. Writing a recommendation is very personal. Keep it that way. Approach a few people one at a time.
c) After you have collected three recommendations, you probably should only ask someone if that person has just written you a nice note or otherwise told you how great you were. Then you might suggest they write it out in a LinkedIn recommendation.
d) Finally, the best way to get recommendations is to Give Them. This is another instance of Giver’s Gain. One tip here, though: don’t write a recommendation for someone on the same day they write one for you. Your connections might see both recommendations being added concurrently and discount them as disingenuous.
STEP SIX: Your Connections
Here I’m going to copy verbatim what I wrote in my earlier post:
The magic number is 500. Once you surpass that number, your total will remain 500+, whether you have 501 or 5,001.
Whom should you connect to?
Some people choose to keep their LinkedIn community close, i.e., only folks they know personally and would be happy to recommend.
On the other side of the LinkedIn world, you will see “LIONS” — LinkedIn Open Networkers, who accept every LinkedIn invitation and display their email addresses.
I, myself, fall in the middle. In addition to people I know in person, I like to “meet” people in Group Discussions and through Q&A, check out their profiles, and send invitations if I think we can support one another in some way.
If you, personally, are FOR or AGAINST being a Lion, please add your opinion in the comment section below
STEP SEVEN: Websites
Here’s a big opportunity that many people miss when they opt for the default titles “My blog” or “My company” or “My website.”
Edit this section, and in the drop down box, click on OTHER. Then you have the chance to write the actual NAME of your blog, company, and website — another opportunity for key words on your profile AND increased “Find-Ability.”
STEP EIGHT: Twitter
The first question here might be should I have a Twitter account, and I would suggest ABSOLUTELY, yes. Then you will not be behind the curve when Twitter replaces email five years from now :-). For a bit more information on Twitter, you might start with by reading some of my blog posts under the category Twitter Basics, especially Twitter 101: Twitter Doesn’t Have to be Stupid and the Workshop Cheat Sheet for Twitter.
If you are on Twitter, list your “handle.” You’ll see that you can post LinkedIn updates on Twitter. Certainly do that. The reverse, however, i.e. posting every Tweet onto LinkedIn is probably not a good idea.
STEP NINE: Your “public” profile
Another simple “fix”: Edit the default URL from a long unwieldy string of numbers and letters after your name to just your name. Of course, like me, someone with your exact name and spelling of the name has probably already secured that URL, so add something like your city.
Here’s mine: http://www.linkedin.com/in/shariweisssf — I merely added “sf” for San Francisco after my name.
STEP TEN: Your summary: a powerful branding statement, which needs to be loaded with key words
Your most time-consuming task, so I’m breaking into workable chunks:
A) Here is the 3-paragraph format I believe is effective for most of us:
- FIRST PARAGRAPH: Communicate quickly and clearly the type of opportunities you are seeking.
- SECOND PARAGRAPH: Highlight 3 or 4 key career accomplishments that demonstrate your qualifications. [Don’t use bullet points. Make it a friendly narrative.]
- THIRD PARAGRAPH: Answer the question: How are you UNIQUE? How are you DIFFERENT?
B) After these short, clear, and concise paragraphs, add a line all on its own [for emphasis] like this:
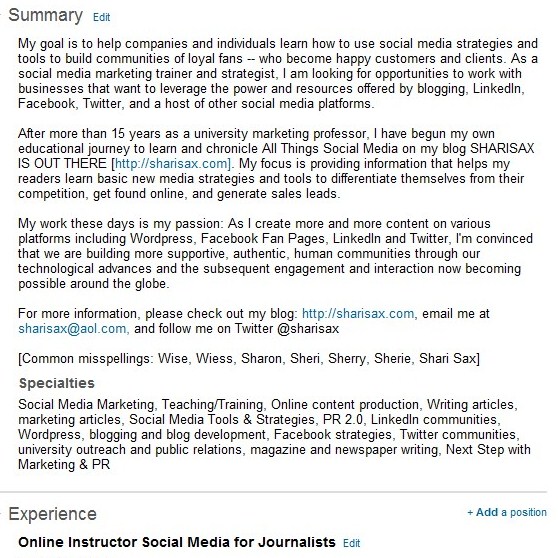
For more information, please check out my blog: http://sharisax.com, email me at sharisax@aol.com, and follow me on Twitter @sharisax
C) Then include a COMMON MISSPELLINGS line like mine:
[Common misspellings: Wise, Wiess, Sharon, Sheri, Sherry, Shari Sax]
If people are looking for you, don’t let them miss you simply because they don’t know how to spell your name.
D) Finally, there is the SPECIALTIES section which is hugely important.
Here you put all the KEY WORDS and KEY PHRASES that people are looking for when they search the LinkedIn site. My latest understanding is that keyword PHRASES are better than single words — to help you differentiate yourself from the many others who mostly put in single words.
My LI summary as an example:
And here’s your LinkedIn profile Worksheet
[you can click the link for a separate worksheet]
1. Photo: _____________________________________________________________________
2. Headline: ____________________________________________________________________
- 2 benefits for audience
- Your “title”
- An email or website or phone number
3. Update: _____________________________________________________________________
4. Current position[s]: Be certain to use keywords [phrases]
5. Recommendations: ____________________________________________________________
6. Connections: _________________________________________________________________
7. Websites: ____________________________________________________________________
Do not use Defaults. Use “other” and Keyword phrases
8. Twitter: ______________________________________________________________________
9. Public Profile: _________________________________________________________________
10. ALL IMPORTANT SUMMARY:
√ FIRST PARAGRAPH: Communicate quickly and clearly the type of opportunities you are seeking.
√ SECOND PARAGRAPH: Highlight 3 or 4 key career accomplishments that demonstrate your qualifications. [Don’t use bullet points. Make it a friendly narrative.]
√ THIRD PARAGRAPH: Answer the question: How are you UNIQUE? How are you DIFFERENT?
√ ADD “for more info” line __________________________________________________________
√ ADD common misspellings _________________________________________________________
√ SPECIALTIES: Include ALL the keyword phrases you think people might use to search for someone who does what you do.
PS Video Filling Out Your LinkedIn Profile from Butterscotch.com. You will see nine other LinkedIn videos as well as other tips for LinkedIn success in the articles on this blog under the category LinkedIn Basics.
PPS If you’ve got other tips, please do list them below PLUS any questions.
PPPS Oh, that’s right. I promised
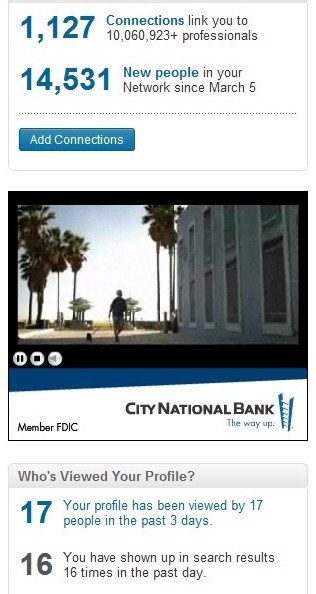
Shari’s getting found scores:


